Workflow
The NVivo Transcription online app has two pages you use for most transcription operations:
- Files page: where you upload and transcribe media files, and manage the transcripts.
- Editing page: where you can view and edit transcript text, play back the audio*, and identify speakers.
*Audio remains paired with each transcript for 90 days after the transcript was created or last edited. After 90 days the audio is automatically deleted and the transcript remains as a text-only document File deletion.
The main features of these pages are described below.
NOTE You can display the interface in Chinese, English, French, German, Japanese, Portuguese or Spanish, see Change the Transcription interface language.
Files page
The Transcription website opens at the Files page. This is where you upload and transcribe files, and view and manage all your transcripts. The image below shows:
- Numbered steps: the basic transcription workflow (for further information, see Supported languages Dictionary)
- Arrows on left-hand side: the main sections of the interface, where files are listed
- Callouts: other features
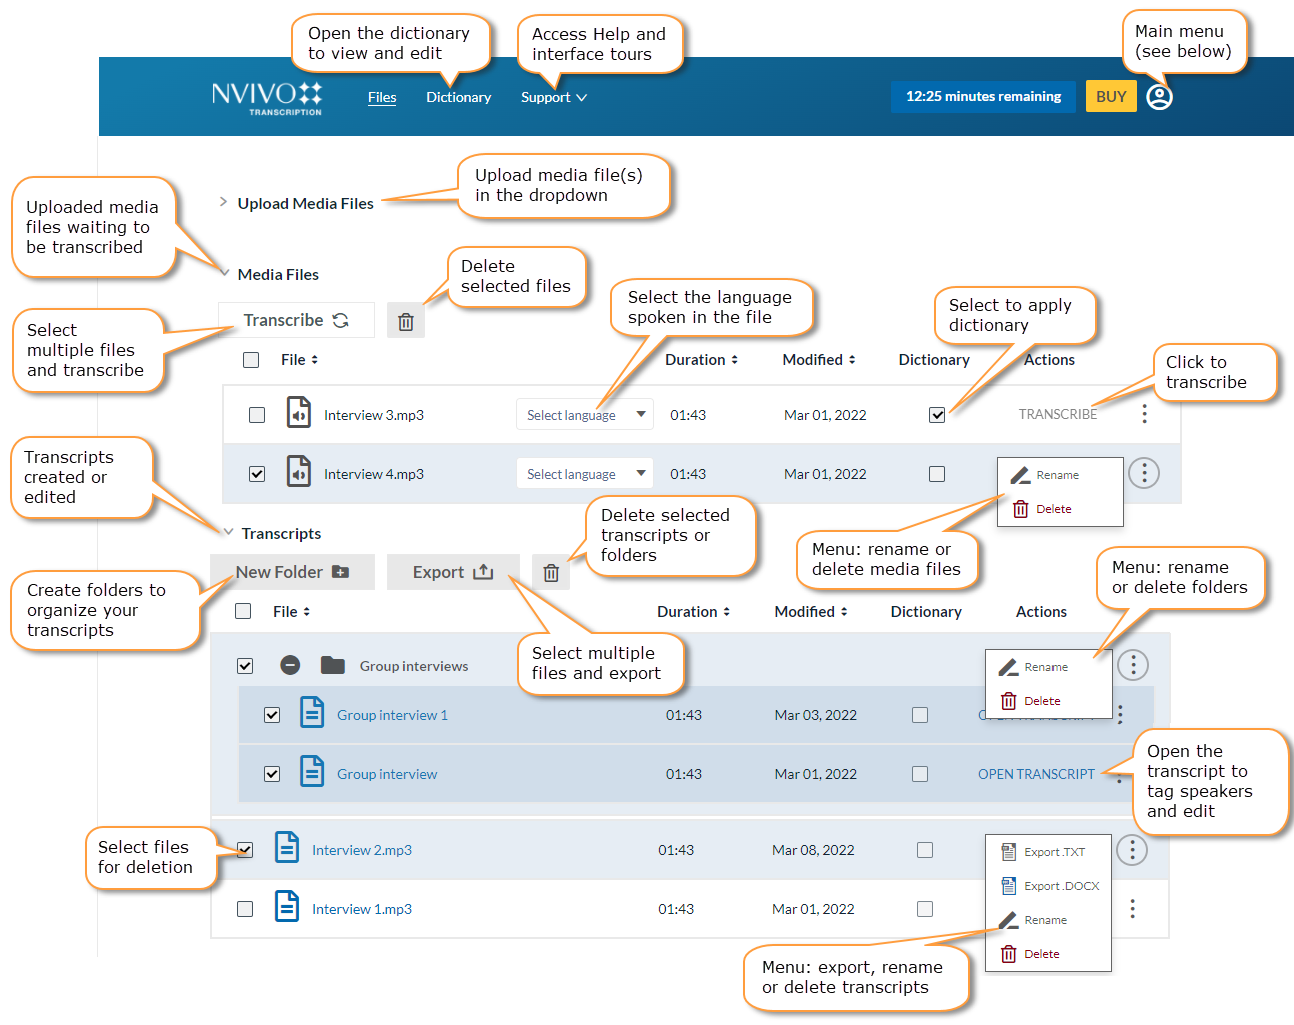
* Uploaded media files must be less than 4 GB file size and 4 hours duration. Supported media file formats
** Audio is automatically deleted 90 days after a file is transcribed or its transcript last edited. For the last ten days before deletion, the number of days remaining is shown.
Auto-transcribe
Using the NVivo Transcription online app, you can upload one or more media file(s) and automatically transcribe at one go.
NOTE Ensure that all the media files are in the same language before uploading using Auto-transcribe.
![]()
- On the Files page, click the Upload Media Files dropdown.
- Click to browse files from device or drag and drop the media file(s) to be transcribed.
If there is a prompt, click Proceed.
- In the Auto-transcribe section, check Auto-transcribe:
- Select the language.
NOTE Ensure that all the media files are in the same language before uploading using auto-transcribe.
- (Optional) Select Apply dictionary to use the dictionary. For more information, see Dictionary.
- Select the language.
- Click Upload.
The transcribed files are listed in the Transcripts section.
Bulk transcribe
Using the NVivo Transcription online app, you can transcribe multiple media files in one go.
![]()
- In the Media Files section, select the media files to be transcribed.
- Choose the language for the selected files.
- (Optional) Select Dictionary . For more information, see Dictionary.
- Click Transcribe.
The transcribed files are listed in the Transcripts section.
Bulk export transcripts
Using the NVivo Transcription online app, you can export multiple transcripts in one go.
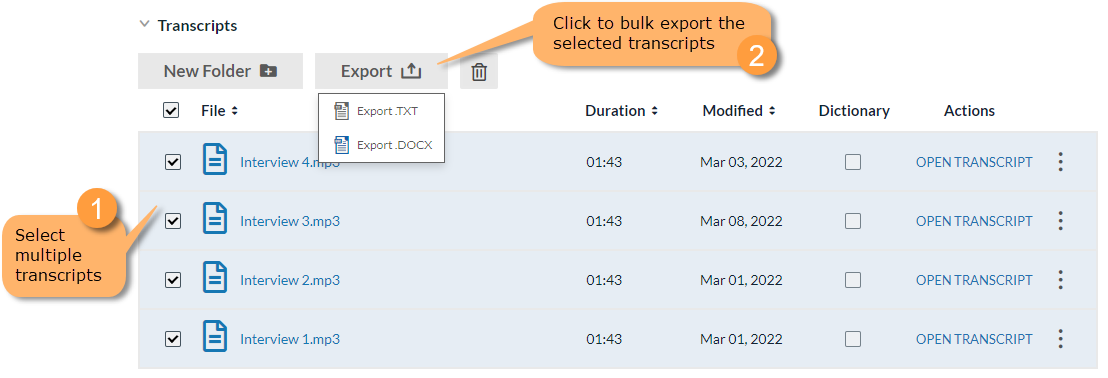
- In the Transcripts section, select the transcripts to be exported.
- Click Export.
-
Select the required file format.
The exported file(s) are downloaded in a zipped folder.
Organize transcripts
You can create folders in the Transcripts section to organize your transcribed files.
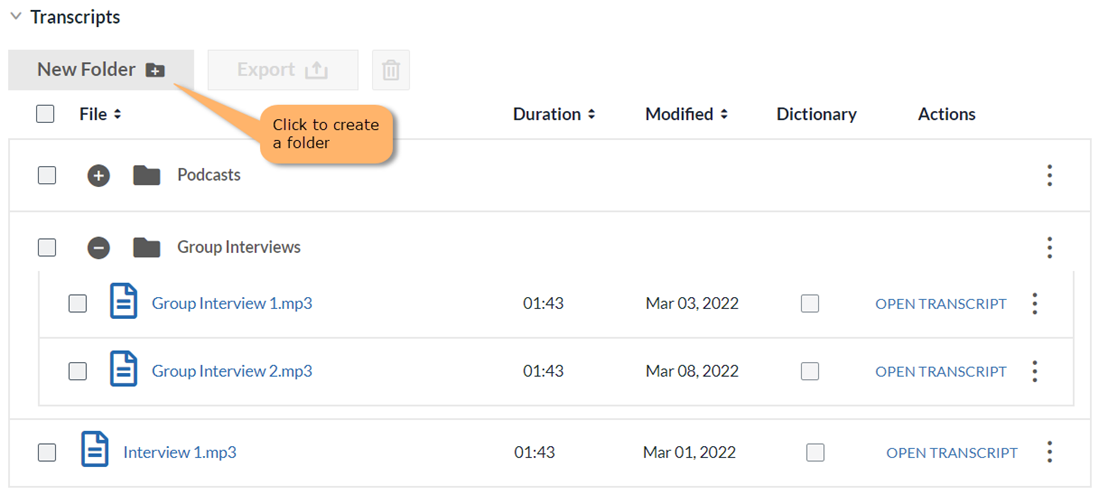
NOTE A root folder  is displayed when all the transcripts are placed in one or more folders.
Main menu
The main menu in the top right of the Files page links you to account management tools.

Editing page
To open a transcript in the Editing page, click OPEN TRANSCRIPT for it on the Files page.
For 90 days after a transcript is created, or following its last edit, the media file's audio remains synchronized with it—as you play the audio the words spoken are underlined in the text. Use the tools indicated below to edit the transcript and tag speakers.
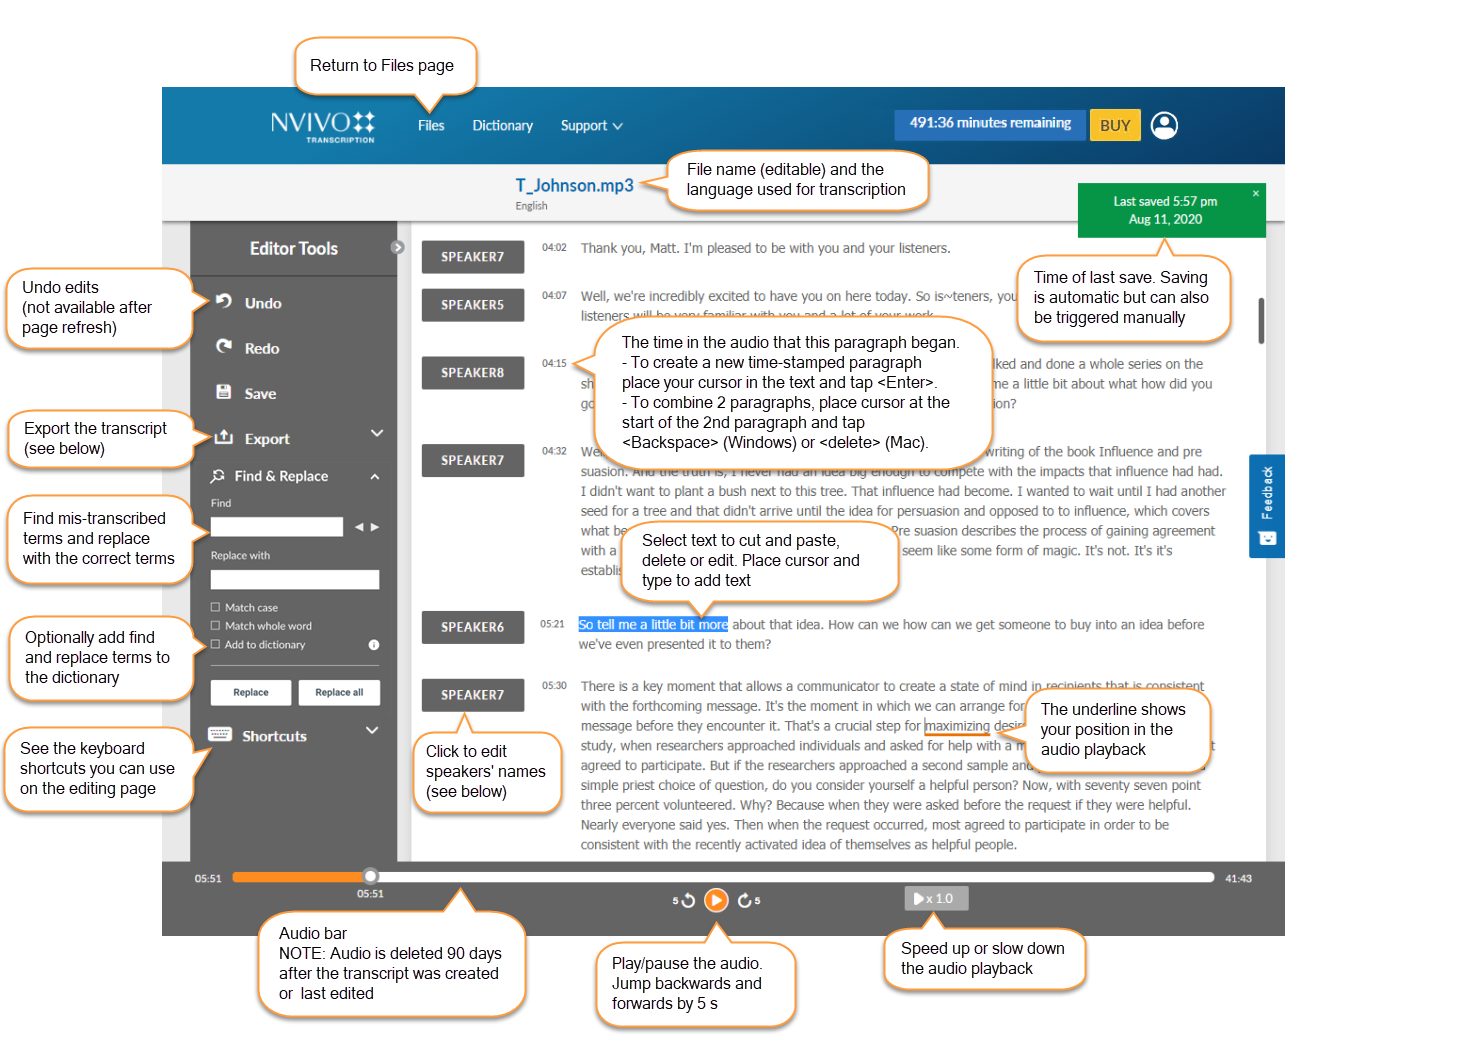
For more information about adding dictionary entries from the find and replace function, see Add 'find and replace' terms.
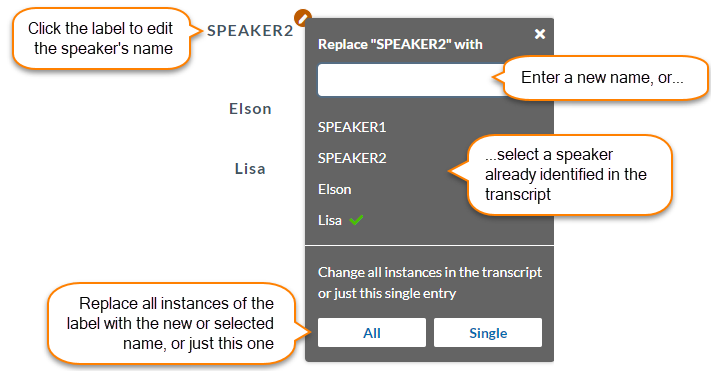
Tag speakers
Transcription uses voice recognition to automatically identify speakers in your audio, labeling them as SPEAKER1, SPEAKER2 etc. You can edit the labels to correct speaker identifications and add real speaker names.
Export transcripts
You can export transcripts from the Files and Editing pages. Choose between text (.txt) or Word (.docx) formats.
NOTE If you intend importing a transcript into NVivo you can use either format for Windows, or text only for Mac Import transcripts into NVivo manually.
Text (.TXT): The transcript is exported as a 3-column tab-delimited file (i.e. there are two tabs in every row). There is one row for each paragraph in the transcript:
- Column 1: timestamp
- Column 2: speaker
- Column 3: transcribed text
There is no header row.
Word document (.DOCX): The transcript is exported in a 3-column table in a Word document. There is one table row for each paragraph in the transcript:
- Column 1: speaker
- Column 2: timestamp
- Column 3: transcribed text
The transcript file name appears as a heading in normal text above the table. There is no header row in the table.
Next: Transcribing from NVivo